Graphics in Plain Language
An introduction to how modern graphics work in video games.
Twiddling those vertices
Welcome back, folks. This time I'm going to be going into a little more technical detail about how we move and animate objects into place.
Graphics programmers often refer to the "graphics pipeline". 3D graphics works a bit like an assembly line, with a definite flow from one stage to another, although it doesn't only work on a single object at a time like a traditional assembly line would.
Modern graphics cards all provide generally the same kind of pipeline, and they have special hardware and software burned into the silicon itself to accelerate this pipeline as much as possible. There is obviously a lot of variation between different vendors and different families of graphics cards, but that's generally not something you have to care about how it works at that level.
Side note
If you're interested in reading about how things work at the abstract hardware level, I recommend Fabian Giesen's Trip through the graphics pipeline. That series of articles is far far more advanced and expects more understanding than this series.
I'm going to be glossing over a lot of the actual details to cover the interesting and important ideas. In this article we're looking at the first part of the pipeline called the Vertex Shader.
Shaders became fairly common place around 13 years ago when DirectX 9 came out, adding vertex and pixel shaders. To explain what shaders are, and compare against what came before, I'm going to talk about what kind of job we're talking about.
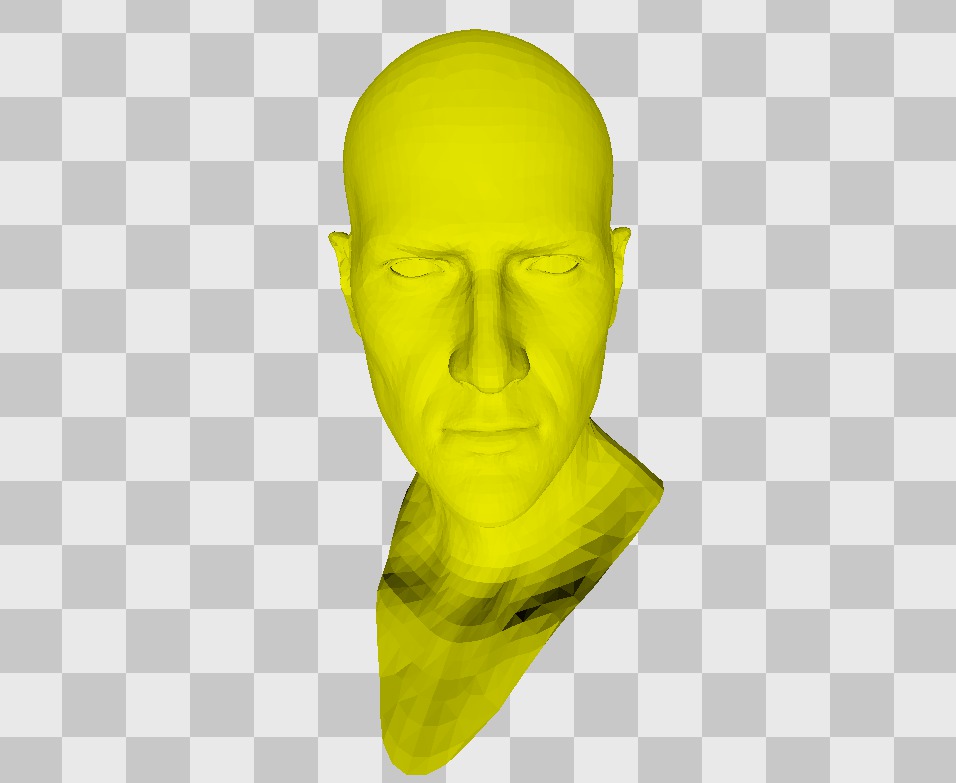
Aiden's wireframe head makes a re-appearance.
If you remember back in Part 2, we looked at the models that make up the game world. These models are made up of individual points - called vertices - joined up into triangles. I said this would come up later, and here is where that promise is fulfilled.
Because everything in the game world is made up of vertices, anything we need to do to those models has to be done in terms of their vertices. When it gets down to the graphics card, all it sees is a long list of vertices. There's no such thing as a running animation, or the swaying leaves of a tree, or any abstract concept like that.
Let's look at a simple example of what we will definitely want to do - moving and placing objects in the world. Let's also just consider the simple case, not a person.
When objects are created by artists in 3D art packages like Maya and 3D Studio Max, they're always created in their own separate world. These objects aren't created straight in place where they are in the Chicago setting, but instead imagine something like the "empty white room" in the Matrix. Each object is placed at the centre of complete emptiness.
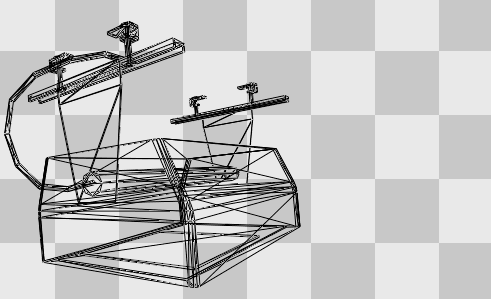
This is a light of some kind underneath the L-train tracks, and it's sitting in its own world.
The model doesn't have any concept of where it will live in the world when it's saved out to disk, nor when it's loaded up and passed to the graphics card. This means that when it comes time to draw the object we need to move it from its own world into the scene that we are drawing. This happens for every object that is drawn, and even fixed unmovable objects like buildings and bridges are still moved every frame from their own worlds into the scene.
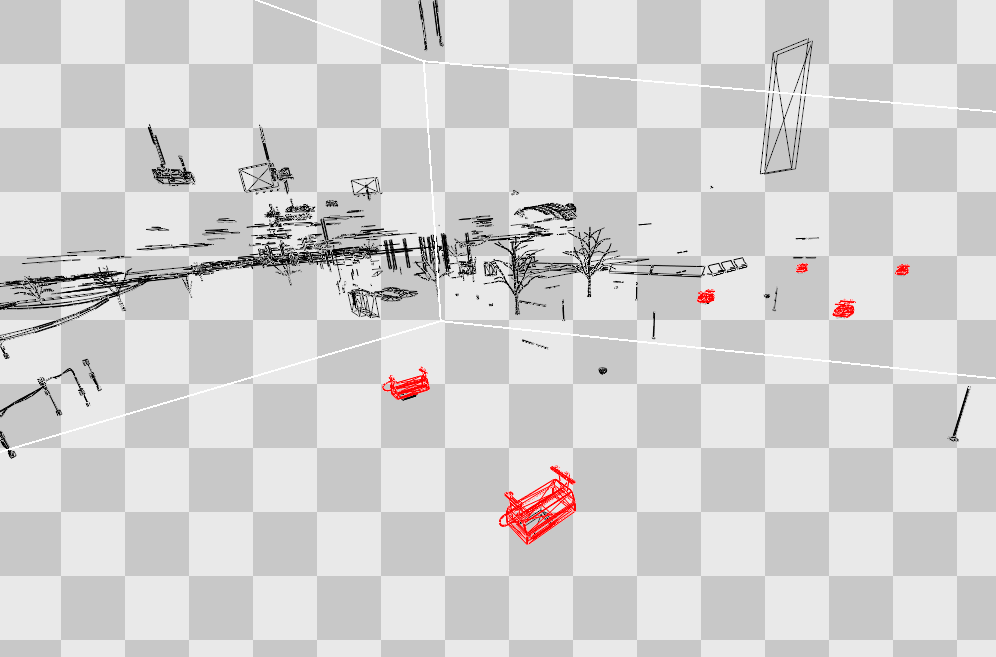
Here we can see several of the lights in place in the partially constructed final scene.
As I mentioned before, the only thing we can do is operate on vertices. We can't just tell the graphics card directly, "hey can you put this light over under the bridge? Then place another light further along? Swell!"
So instead of telling the graphics card what we want to do with the object itself, we need to tell it what we want to do with all of the vertices. It turns out in this case it's actually very simple. If we change all of the vertices in the exact same way, and keep them all fixed to each other, then that's the same as moving the object as a whole - because every part of it moves in exactly the same way. All we need to do is figure out that "change" part, which is called a transformation.
Side note
The mathematics behind this isn't too complicated but it's not relevant for this series. If you've covered linear algebra before then you've probably learned everything involved - it mostly boils down to matrix multiplication of vectors.
Up until the introduction of vertex shaders, your options were pretty limited in what you could do in this vertex transformation on the graphics card. Moving and rotating objects was a given, and you could do some other simple things, but nothing exaggerated or complicated.
Vertex shaders are small computer programs that actually run on the graphics card. They take one vertex, do anything they want, and spit out the output vertex. They don't have to just move it, they can make it jump up and down, move away from the nearest vertex, sway back and forth depending on the wind, animate, or anything else.
I've taken one of the vertex shaders that Watch Dogs uses, and played around with it to expose what it's doing. It's a little fiddly but I was able to find the vertex shader used for characters and change it. There was a different vertex shader used for actual skin like faces and hands, but you'll quickly get the idea.
I've applied a very simple change to put a ripple into the characters, but otherwise everything applies as normal.
You can see in the animation above that it looks like the characters are weirdly distorted with the ripple. This goes back to our idea of "if we move every vertex, it's like the whole object has moved". The vertex shader change I made only ever works on one vertex at once, but because they all are all working on the same ripple, the effect ends up applying to the whole object.
We can also simply change the "simple moving into place" part of transformation so that instead of putting the characters where they should be, they rise above the ground. This isn't simulated with physics so this has nothing to do with gravity or collision with other objects - we could make everyone float if we wanted.
In this animation we set the vertex shader to slowly rise and fall over time.
This is obviously not very constructive but it does give us some idea of how vertex shaders worked - if we now wanted to animated the leaves on a tree to sway back and forth, we could use something not too different to this. Instead of rising and falling, we would sway back and forth in the direction of the wind. We can then make the wind stronger and lighter, to make the tree sway more or less.
Here we can see what happens if we set everything to get bigger by about 7 times.
I'm oversimplifying a bit, but by and large "moving objects into place" is the purpose of most vertex shaders. The exception to that is for any animated objects - people and animals, as well as things like swinging ropes, flapping cloth, etc.
Animation of people happens around the idea of a skeleton and a "skin". The skeleton is a simple representation of a moving person. Instead of worrying at this point about animating belt buckles, hats or jeans we only consider the important movements - which tends to correspond pretty closely to a human skeleton.
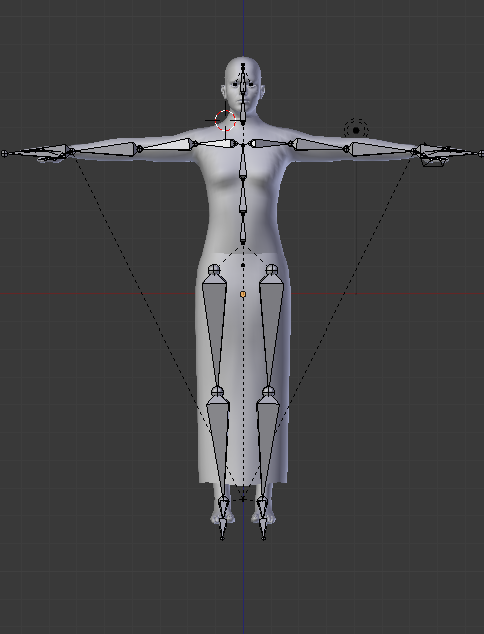
This shows a simple skeleton for a human figure. This isn't from Watch Dogs as this kind of information is very difficult to visualise outside of the artist's creation packages.
Image licensed under the Attribution-ShareAlike CC BY-SA (c) MakeHuman team 2001-2014
This is the bind pose or "T" pose, showing what characters look like without any animations applied at all.
The animations - running, walking, jumping, vaulting - are all applied only to this skeleton. This makes the process very simple as we only have to consider a hundred or so bones, rather than thousands upon thousands of vertices.
Each vertex is then paired up with one or more bones while in a static pose, in an association that's called the "skin". Originally in the time of Half-Life 1 when this technique was just starting to become common, each vertex was paired with a single bone. These days vertices are typically paired with up to four bones, with weighting given to each bone so each vertex can be affected a little or a lot. By doing this you can have a more smooth animation by letting bones overlap in affecting different areas so you don't get sharp lines when arms or legs move.
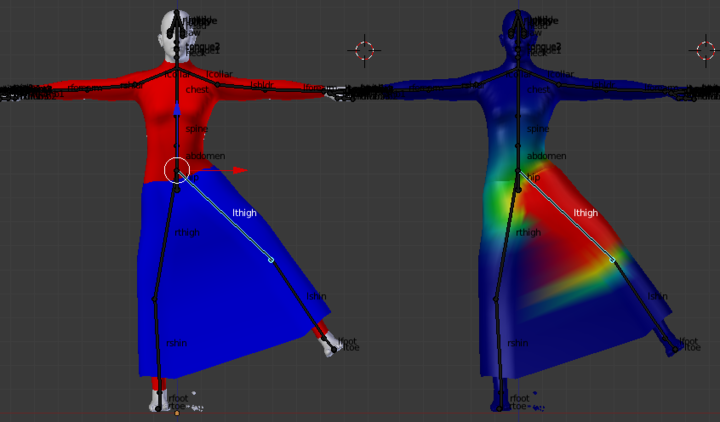
This shows the above skeleton with the thigh bone rotated, and colours showing the weighting of the thigh bone against the vertices in the model.
Image licensed under the Attribution-ShareAlike CC BY-SA (c) MakeHuman team 2001-2014
There are some limitations to this technique, particularly around clothing and skin where it bunches up and compresses & expands around joints like the elbow and shoulder. It's not a perfect way of animating but it is very efficient. The biggest limitation is that it's very difficult to believably animate faces in this way. You can make a lot of 'fake' bones around the face, e.g. for the eyebrows and around the mouth, but it's a crude approximation of musculature and skin.
The other important fact about this technique is that the pairing between vertices and bones is very particular and it's relative to how the pairing was created. It's quite possible to share animations between many different models, but every individual model that has to use a skeleton has to be paired up with the vertices. The reason for this is that the animation only works by moving the vertices from their original location relative to the skeletons. If the vertices aren't in the expected positions then things go... poorly.
If the model doesn't match the skeleton it's using, the animations will go very very wrong.
If we widen the characters by a couple of times you can get a kind of 'Donut Drake' type effect, but you can see the animations go more wrong towards the hands, as they are furthest away from their original positions.
The first animation especially probably looks strangely familiar - animation glitches like this happen in games every now and then and it's usually caused by the wrong animations being applied to a skeleton, or the wrong skeleton being used for a model. As with textures and models, the skeleton, skin, animation and model all have to be carefully matched up or things go sour very quickly.
Hopefully you now have some idea of the purpose that vertex shaders serve, and how animations are applied to change a static model into a living breathing person. Next time we're going to look at what happens once we have the vertices and triangles all set up in place, and the magic sauce that transforms a 3D world made out of triangles into a 2D image on screen made out of pixels.